Take Photo and Upload to Aws S3 Xamarin
When developing an Android awarding, you may sometimes need to take images from the device's photographic camera and utilise it. Yous may even want to store these images on the device. And past specifying the file proper noun yourself. Or view it on some other folio. If you need ane of these, this mail service is for you lot.
In this article, I will tell you how to take photos from the camera with MediaStore in Xamarin.Android and how to place them in ImageView. In addition, you lot will be able to proper name the images you have taken. And you will be able to store these images in the local binder. Follow the steps below to come to a conclusion. If you want to choose a photo from the gallery, cheque out my article chosen Xamarin.Android Upload Prototype From Gallery.
And then let'due south started.
1) Create Photographic camera.xml Layout
Showtime, y'all need a layout for the interface. To add a layout, go to Resource / layout in the project. Then correct click on the layout folder and create a new layout by selecting Add> New Item> XML File. I named this page Camera.xml. You tin name it even so y'all desire.
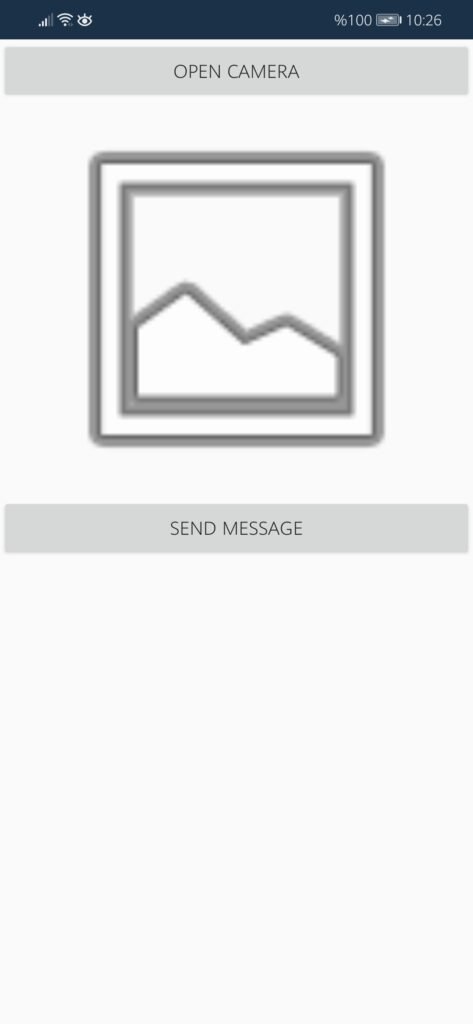
Add a button to open up the photographic camera and an ImageView to identify the image in the photographic camera.xml layout. And then set the id values of the button and ImageView as follows.
<?xml version="1.0" encoding="utf-viii"?> <LinearLayout xmlns:android="http://schemas.android.com/apk/res/android" android:orientation="vertical" android:layout_width="fill_parent" android:layout_height="fill_parent"> <Button android:id="@+id/myButton" android:layout_width="fill_parent" android:layout_height="wrap_content" android:text="open up Camera" /> <ImageView android:src="@android:drawable/ic_menu_gallery" android:layout_width="fill_parent" android:layout_height="300.0dp" android:id="@+id/imageView1" android:adjustViewBounds="truthful" /> <Push android:text="Send Message" android:layout_width="match_parent" android:layout_height="wrap_content" android:id="@+id/sendCamera" /> </LinearLayout> The screen output will also look like this:
2) Create CameraActivity.cs
Later adding the Camera.xml layout, yous must create the activeness of this layout. This activity will contain the methods of the views of the Photographic camera.xml layout.
To add a new action, right-click the Resources binder and select Add> New Detail> Activity. I named this action CameraActivity.cs. Y'all can name it however you desire.
Next, you have to set the layout of this activeness as the Camera.xml layout. To exercise this, first define the necessary variables for the button and ImageView. Then define the click methods in the OnCreate () method.
Here, carefully review the onCreate () method. Showtime, the OnCreate () method checks if at that place is an application using the camera with the IsThereAnAppToTakePictures () method. If non, it creates a directory for the paradigm file with the CreateDirectoryForPictures () method.
Finally, the OnActivityResult () method displays the image taken from the photographic camera in ImageView using Bitmap.
[Activity(Label = "CameraActivity")] public course CameraActivity : Activity { individual File _dir; individual File _file; private ImageView _imageView; protected override void OnActivityResult(int requestCode, Result resultCode, Intent data) { base.OnActivityResult(requestCode, resultCode, data); // make information technology available in the gallery Intent mediaScanIntent = new Intent(Intent.ActionMediaScannerScanFile); Uri contentUri = Uri.FromFile(_file); mediaScanIntent.SetData(contentUri); SendBroadcast(mediaScanIntent); // display in ImageView. Nosotros will resize the bitmap to fit the display // Loading the full sized image will consume to much retentivity // and cause the application to crash. int height = _imageView.Elevation; int width = Resources.DisplayMetrics.WidthPixels; using (Bitmap bitmap = _file.Path.LoadAndResizeBitmap(width, summit)) { _imageView.RecycleBitmap(); _imageView.SetImageBitmap(bitmap); string filePath = _file.Path; } } protected override void OnCreate(Bundle bundle) { base.OnCreate(packet); SetContentView(Resources.Layout.Photographic camera); if (IsThereAnAppToTakePictures()) { CreateDirectoryForPictures(); Button sendBtn = FindViewById<Button>(Resources.Id.sendCamera); Push button = FindViewById<Button>(Resource.Id.myButton); _imageView = FindViewById<ImageView>(Resource.Id.imageView1); sendBtn.Click += SendBtn_Click; button.Click += TakeAPicture; } } private void SendBtn_Click(object sender, EventArgs eastward) { var intent = new Intent(); Bitmap bitmap = _file.Path.LoadAndResizeBitmap(50, 50); string bit = Convert.ToString(bitmap); intent.PutExtra("bitmap", bit); Uri contentUri = Uri.FromFile(_file); string uriName = Convert.ToString(contentUri); string filePath = _file.Path; intent.PutExtra("filepath", filePath); intent.PutExtra("image3", uriName); SetResult(Event.Ok, intent); Finish(); } private void CreateDirectoryForPictures() { _dir = new File(Environment.GetExternalStoragePublicDirectory(Environment.DirectoryPictures), "CameraAppDemo"); if (!_dir.Exists()) { _dir.Mkdirs(); } } private bool IsThereAnAppToTakePictures() { Intent intent = new Intent(MediaStore.ActionImageCapture); IList<ResolveInfo> availableActivities = PackageManager.QueryIntentActivities(intent, PackageInfoFlags.MatchDefaultOnly); render availableActivities != naught && availableActivities.Count > 0; } private void TakeAPicture(object sender, EventArgs eventArgs) { Intent intent = new Intent(MediaStore.ActionImageCapture); _file = new File(_dir, String.Format("myPhoto_{0}.jpg", Guid.NewGuid())); intent.PutExtra(MediaStore.ExtraOutput, Uri.FromFile(_file)); StartActivityForResult(intent, 0); } } Methods, Fields and Properties
MediaStore Class
- ActionImageCapture() : It is a Standard Intent action that allows the camera app to capture and return an image.
- ExtraOutput : The name of the Intent-extra used to bespeak a content resolver Uri to be used to shop the requested image or video.
Environment Class
- GetExternalStoragePublicDirectory(String) : Go a meridian-level public external storage directory for placing files of a particular blazon.
- DirectoryPictures : Standard directory in which to place pictures that are available to the user.
Conclusion
Our application is ok. You can transport the image you lot added to the photographic camera folio as PutExtra in the OnSaveClick () method. And so on other pages, y'all can pull these extras and access the image values.
As a result, the application will work as follows. Beginning, Camera opens with the Open Camera button. Then you lot take a moving picture. Finally, this photo you took appears in ImageView. If you wish, you can send this prototype to other pages with the SendMessage button.
In this article, I explained how to have photos from the camera of the device with MediaStore in a Xamarin.Android awarding. Besides to show this photograph in ImageView and store it in local folder. I hope information technology was useful.
If you are all the same not sure what to do, then I suggest you use the comment department below and permit me know! I am hither to assistance!
- Xamarin.Android Upload Prototype From Gallery
Source: https://www.serkanseker.com/xamarin-android-take-photo-from-camera/
Post a Comment for "Take Photo and Upload to Aws S3 Xamarin"